Friday, December 28, 2018

Kokie Cosmetics - Duo Metallic Shadows in Beloved, Review and Tutorial

Hi everyone!!  I'm so happy to have you back here with me.  I wanted to talk today about a product I have seen a couple times at my local Walmart and I finally decided to grab it and try it out.  It's the Kokie Cosmetics Duo Metallic Shadow.  I picked up the shade in Beloved and paid $7.98 US for the duo.


This is a cream potted shadow on the top, and underneath is another pot that contains the same color but in a very shimmery pigment.  I had picked this product up several different times in the past, but kept putting it back on the shelf.  I couldn't figure out what to do with a cream shadow and pigment in the exact same shade.  But I finally grabbed it again and bought it.


I am happy to have purchased it.  It proved to be much more than I had originally thought. 


When I first looked at the pigment, my thoughts were to immediately grab my glitter glue because the look of it in the pot is like real straight up glitter.  After swatching it out on my arm I realized it's not an actual glitter but a true shimmer pigment.  So don't be deceived by the look of the pigment. 


I have used this product two ways so far.  I first went in with just the cream alone and wore that look all day, it made for an outstanding one and done shadow.  It did not crease at all on me, and I did NOT use an eye shadow base either.   The staying power on just the cream did quite well.  I noticed some fading in the later part of the afternoon but it was only slightly.

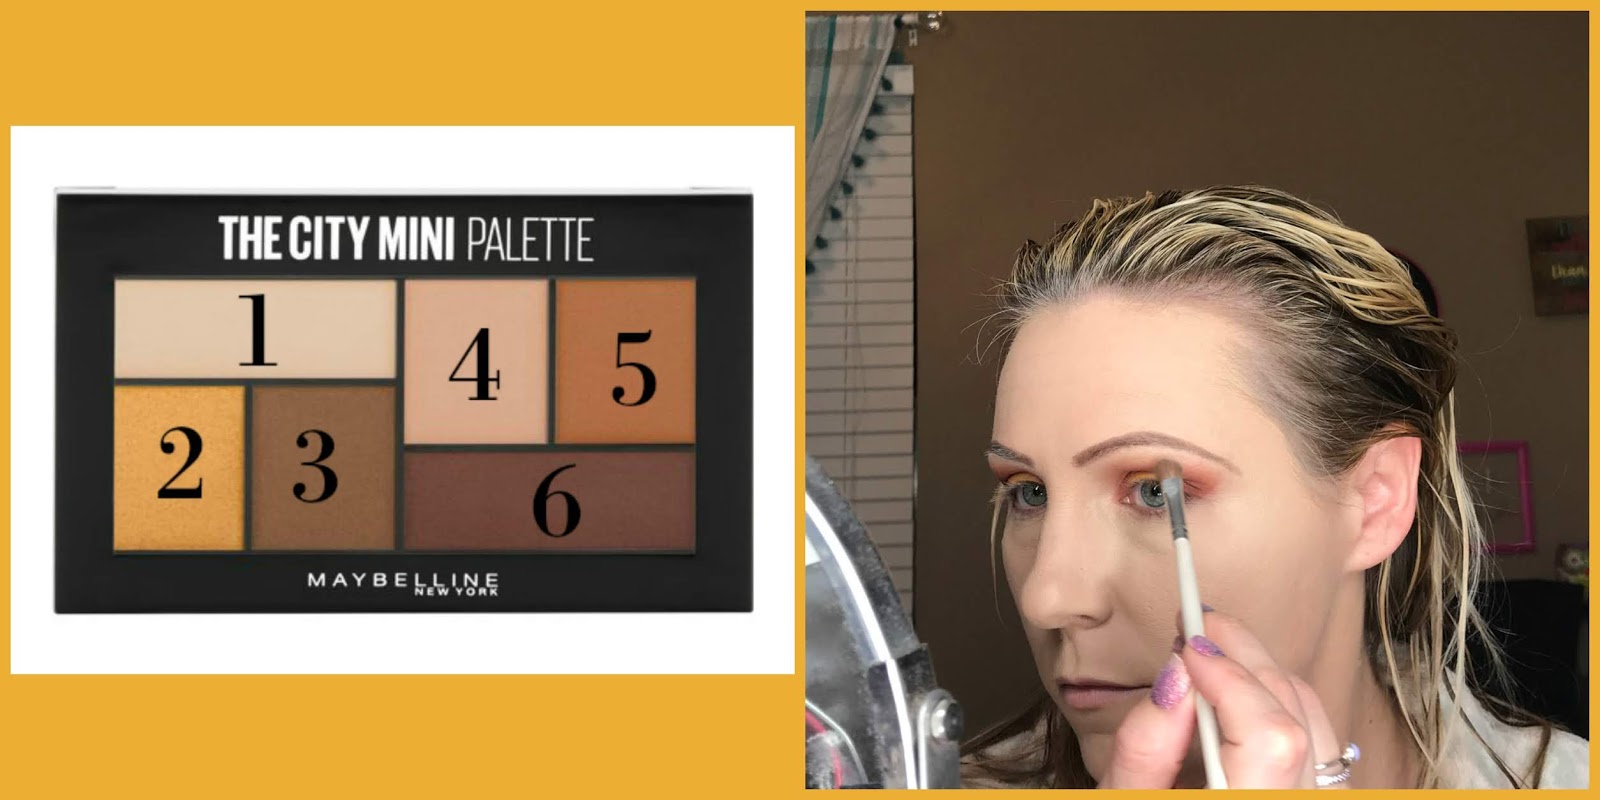
The next way I used it, I will show below.  I used the cream all over and concentrated heavier in my outer V and then smoothed the pigment over top, on only my lid.


I did not have any fall out from the pigment, which was a bit shocking.  I did tap off my brush however.  One thing I noticed about the pigment was that it applies much better when you drag your brush across to apply and not just pat the pigment on you lid.  This pigment works really well when applied with your finger.


I went back in with the cream pot and smudged it on my lower lash line.


I did not see any fall out during the day and the staying power was mind blowing for me with both of the shadows together.  I even had some mommy meltdowns and shed a few stressful tears and the shadow stayed in place and didn't budge.....that was more than I can say for my liner though.

Speaking of liner, I did use black liquid liner on my top lash line and it went over the pigment with absolute no trouble.  There was no skipping or need to go over a spot to darken.

Along with Pearlescent Pink blush from Wet N Wild and Maybelline's Keep Me Coral lipstick and my look was complete.


So what are my final thoughts on the product?


I think it's a fantastic product and I am happy I purchased it.  I love this color called Beloved that I purchased, but I am going to get a few more....I think there are 4 in the entire collection.  I am most certainly going for the greenish / blue called Deep Sea but I my eye has been also wondering towards the dark blue called Night Star.

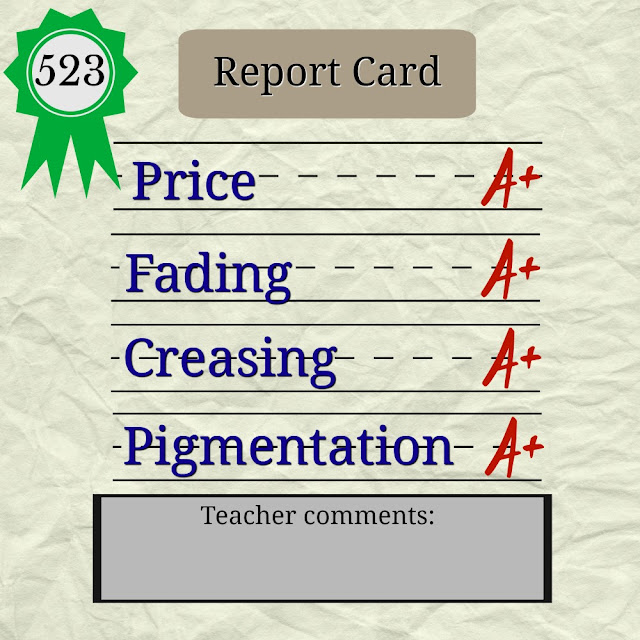
The price is reasonable for what drugstore makeup is at, I love the ease of the product, blending out the cream is an absolute breeze, it's a durable shadow that does not crease and most importantly that last for a very long time on the eyes.


Well, that's my review and how I used the Kokie Cosmetics Duo Metallic Shadow.  I hope you enjoyed it and found it useful.  That's all I have for today.....coming up next will be my review on the heated eyelash curler that Santa put in my stocking this year.


But that's all for now,  I hope you all have a beautiful day and will come back and visit me again here at 523.  Until next time, take care.

-Kim


Friday, December 21, 2018

Red Lips for the Holidays? Yes, Please!!


There is something so traditional about Bronze eyes and fiery red lips around the holidays....it's a look I will wear at least to one Christmas party...or several.  You just can't go wrong when pairing these two together.  So today I thought I'd show you how I get my bronze eyes and red lips for the holidays.

I decided to use the Maybelline City Mini in Roof Top Bronze for my eye look and the red statement lip is from the Maybelline Super Stay Matte Ink Liquid lipstick line in Pioneer.

Let's get started...

First up I applied color #3 all in my crease with a fluffy brush and then I patted it all over my lid with a flat shader brush.


I went in with color #6 and a more precise brush and applied it to my outer V and then used it to deepen the crease a little.  I used a clean blender brush and just buffed out the edges of the dark shadow to make it all melt together.


I used color #3 again on just the center of the lid this time...I wanted to make sure I didn't lose that on the last step.  I want that bronze shade to really come through on the middle part of my lid.  I took color #1 and applied it on the inner third of my lid, just slightly overlapping the bronze to make it blend and also applied it to my inner corner.


I went in with a brown pencil in my lower water line and then smudged it out with color #3 on the lower lash line.  I lined my upper lash line with black liquid liner, curled my lashes and applied a ton of mascara.


I went in with Bellisimo Bronze blush from Milani.  I thought that the bronze-y blush color would compliment the look nicely.  Then I carefully applied the Maybelline Pioneer color to my lips.  I had to go back in with concealer to fix the lip line a bit...the wand wasn't quite as precise as I would like for it to be, so I made a bit of a mess.


But after the clean up, that was it!! The look was complete.


Do you go to holiday parties?  Are they with friends or is it all family gatherings?  Ours are all family...both Brad and I still have grandparents on both sides still living so we go to our own parents houses, plus the other four grandparents places and then we have our own Christmas with just Brad, Caleb and I at home.  To be quite honest, we don't have time to go to other parties with our large families and their gathering.

Anyways, I hope you enjoyed the tutorial and will come back for more here at 523! I hope you all have a very safe and happy holiday season!!

-Kim

Wednesday, December 19, 2018

Wet N Wild Nude Awakening Tutorial 2


Hello and welcome back!

I'm happy to have you here today as I showcase my second tutorial using the Wet N Wild Nude Awakening pallet.  I hope you enjoy.

I did this look over the weekend so I had plenty of time to prep my face, eyes and lips, drink a ton of coffee and play with makeup.  So that's just what I did.

I decided to do a full on lip scrub and treatment, drink a little coffee and of course do my brows.


For my eyes, I first went with a flat shader brush and packed color #5 all over my lid.


I used a crease brush to sweep color #1 all throughout my crease.


With a smaller crease brush and color #7 I concentrated it in the outer V and the lower part of the crease to deepen it up a bit.


I used cream pencil liner in my lower water line and then smudged color #7 on the lower lash line.


Color #2 on the brow bone, clean up the fall out with concealer, line my upper lash line with black liquid liner, mascara, Maybelline Chocoholic bronzer to warm up the complexion, Milani Blossomtime blush, and then I followed it up with Chapstick Tint + Treat lip balm in Nude Tint.


And that was the look...pretty simple and easy and not too over the top.  If you wanted it to look even more natural you could omit the liquid liner on the top lash line.


That's all the makeup talk I have for today.  My next post, I will be showing off my new favorite red lipstick.  It's long wearing, bright and beautiful...especially for the holiday season.  I hope you will come back to visit me again here at 523!

-Kim

Tuesday, December 18, 2018

Wet N Wild's Nude Awakening Pallet - Tutorial

Hello and Happy Tuesday!!

Today I wanted to give you a tutorial on the Wet N Wild pallet in Nude Awakening.  While it's not a "natural" look, it is definitely on the "neutral" side.  There's not any real wild and crazy colors in this pallet so for me it takes a little thought to find different looks with these colors.


But let's get into the tutorial...

I first went into the transition color #1 and swept it thru my crease with a fluffy blender brush.  Then I went into the last transition color #10 and brushed it also thru my crease but a little lower down...and be light handed with this color, it can pack a punch if you aren't careful


I then took color #10 again and applied it more concentrated in my outer V, again being very careful when using this shadow.  Next I packed color #4 on a flat brush and spritz it down with setting spray and patted it on my lid.  You MUST use setting spray to get the intensity to come thru with this shadow...its one that is very flaky and dusty....but when you use a setting spray the real magic comes out to play.  It's quite strange to be honest, just how this shadow works.


I went in with color #2 and used it on my brow bone to give it a bit of lift.  I then lined my upper lash line.  And, next I lined my lower water line, apparently way too heavy, because I felt the need to go in with color #1 to smudge it out on the lower lash line, just to help tone down the harsh blackness.  I was really meaning to use a dark brown pencil, but that's how it goes sometimes.


To finish my look I used Loreal's Baby Blossom blush and Loreal Metallic lip in Moon Lust.  I kinda liked the metallic-ness in the eyes and lips together.  Most of the time, I will do a matte lip with a very shimmer eye look, but today I just wasn't feeling the matte lip.


And there's my look......


What do you think?  I liked how this look turned out, and I was in total shock to see what shadow color #4 did with the setting spray added to it.  My thoughts are still up in the air about this pallet....I have one more look using this pallet that turned out nice, but the rest have been total bombs for sure.

I usually rate my thoughts quite a bit on how many different looks I can get from a pallet, along with the quality and ease of use.  So I'm still working on it, and I will keep you posted on what or if I am able to create.

I do notice a few shadows that look like potential dupes.  The pallet doesn't look like any sort of complete pallet dupe, but the transition color #1 really looks close to a color in the Urban Decay Naked 1 pallet, and color #5 has a similar look to Stila's Kitten shadow.  I have both of these so I will do some comparing this week to see what I can find.

Well, that's all I have for today.  I will see you all again really soon!

Until next time, take care.

-Kim


Wednesday, December 5, 2018

Maybelline City Mini Pallet in Hi Rise Sunset Review and Swatches

Happy Wednesday!!


I have just finished my semester exams....whew, I am tired!! But relieved they are over, at least for now. So the hubs is away again for the very last training for work.  So Caleb and I are just lazing out this week until he gets home.

I don't know why, but the last time he had to go out of town, things just fell apart.  What's funny is that I do most of the cooking, cleaning and taking care of Caleb, but when Brad is gone, our whole life just goes awry.  I guess because the things he does to help, like getting Caleb dressed in the mornings, making the bed or doing the dishes are things that I am so used to him doing that I forget that they still need to be done.  Or the fact that he's not here just bums Caleb and I out so bad that we just don't feel like doing what we are supposed to do.....actually, that's probably more of what it is.  :/

But anyways, he comes home tomorrow, so all will be back to normal.  So today I wanted to give you the swatches, overall review and the photos of the three looks I created with the Maybelline City Mini Pallet in Hi Rise Sunset.


Let's look at swatches....


The formula is the same as all the other City Mini pallets, whereas they are buttery and soft.

However, you must be aware that with these soft and buttery formula, you will get a ton of fallout.  It's imperative that you tap off your brush before applying the shades.

I personally love this formula and I always tap off my brush, so I have no problems with it.  But I know that it can be an issue with some people.


Let's talk pigments, shall we?

As you can plainly see from the yellow, these are highly concentrated with pigments.  You don't typically see yellows like that in drugstore pallets.  So I am extremely impressed with the pigment of each shade.


I don't notice any sort of patchy-ness with any of the shades....typically the maroon type of shades are usually a bit more hard than most other colors, at least in my experience with makeup.  But, none of that has taken place in this little pallet.

I do wish that they would have included a very dark brown in the pallet though.  You can use a setting spray to make the intensity of the brown and maroon colors a bit deeper.  But it still will not give you the depth of a chocolate brown color.  But that's just my opinion. 

However, I do determine my entire thoughts on whether the pallet gives you the ability to make multiple looks with only what is inside it.  I do feel that this little pallet does give that to you.  I have made multiple looks with using only this pallet and they have all come out really well.


I like the pigment and intensity of these shadows when they are dry, and I like that the colors will work nicely with a setting spray as well to give you more of an intense look.  So far, I have not had any sort of "hard pan" from using a setting spray and that is another thing I look at.

So my final thought is that this is another winner for the City Mini pallets!!

Well, I guess that is all that I have for you today.  I hope you have a wonderful rest of the week, and I will be back again with more, later on.

Until next time, take care.

-Kim

Monday, December 3, 2018

Another Tutorial with Maybelline City Mini in Hi Rise Sunset

Hello and happy Monday!!


How was your weekend?  Mine was fantastic!!

We went up to the town square for their annual Christmas on the Square....it's no wonder we have never been...there wasn't too much for the kids to do.  There were a few bounce houses and a small petting zoo and the rest were vendors selling stuff that had nothing to do with the kids.  So that was a bummer, but on Sunday we had a great time with the in laws at the Highland Park housing addition in Dallas TX.


It's a large suburban area that houses the wealthy in Dallas TX.  Football hall of fame legend, Troy Aikman and the owner of the Dallas Cowboys, Jerry Jones, both live in this neighborhood.  They offer carriage rides to look at all the Christmas lights and displays in this luxury neighborhood.  So we had a great time with the family.  I gotta admit....I'm not quite sure what some people are thinking when they decided upon the housing choice...some house looked like something from outer space and others looked like Morticia Addams would walk out of the front door.  But of course, to each his own, right?

Anways, let's get to today's post.  Today I wanted to show you my last tutorial using the Maybelline City Mini pallet in Hi Rise Sunset.  This was a look I did the weekend before last.  I loved this look and how it turned out.  I never thought I'd enjoy yellow eye shadow, but here I am loving it!!  So let's get to the tutorial...shall we?

Okie, dokie, we are going to prep our transition with color #5 in the crease with a fluffy brush.


I'm not gonna lie....I used the exact same brush (I suppose I was too lazy to reach 10 inches for another) and dipped into color #6 and applied it all through the crease, keeping just slightly below the transition color, and deepened the outer V with it.


I took a flat brush and dipped into color #6 again and applied it to the outer lid and inner third of my lid, leaving a gap in the center.  I used a setting spray also, to deepen the outer lid portion, because it didn't get quite as deep as I wanted.


Again with the flat brush I dipped it into the yellow color #2 and applied it directly to the center lid.  Concentrate it mostly on the absolute center and then tap it outwards towards the inner lid and the outer lid.  You want to have minimal product on your brush when you tap over the area of where the deep red meets up with it.  This will give it a gradient effect and not look like a harsh yellow spot on your eyelid.


I used color #1 on my brow bone to give some lift to it.


I then went in with my Wet N Wild Zodiac highlight bar in Earth and patted on the inner corner for some mad highlighting.


I lined my lower lash line AND water line with a brown pencil, and then I also added black liquid liner on the top lash line....you can tell when you need a new liquid liner when your lines get waaayyy too heavy handed.  I'm going after work to pick up a new liner today. :)


I then went back with color #6 and used it to top the brown lower lash line pencil liner.  Curl the lashes and apply mascara and you are done with the eyes.


I used Apricot in the Middle from Wet N Wild as my blush and Rimmel's Heartbreaker liquid lipstick.


And that was all there was to the look.  While I may not wear this look EVERY day, I thought it was a beautiful look for Fall and I have the perfect mustard yellow sweater that I think would compliment this eye look perfectly.  I might have to try that out, now that I think about it.  My next post will be the swatches and my final review on this particular City Mini pallet from Maybelline.  So be on the look out for that.


Now, for the last little bit of my post....I am going to give you a run down of Caleb's Elf on a Shelf.  If you need some ideas, feel free to grab them from me.

The first day was his arrival with his new puppy Fluffy, the next day they toilet papered the Christmas tree and then last night they decided to have a slumber party with Scooby.....Scooby did not like someone else in his bed.


That's all I have for today, I will talk to you all again very soon, until next time, take care.


-Kim